eight weeks pregnant

  • Subscribe to our RSS feed.
  • Twitter
  • StumbleUpon
  • Reddit
  • Facebook
  • Digg
Affichage des articles dont le libellé est make it yourself. Afficher tous les articles

dimanche 24 mars 2013

Homemade Natural Deodorant That Works!

Posted on 22:43 by Unknown


When we first started out the road to living more naturally... one of the first things to go was the deodorant.

The Stinky Story
It was a bold step for us at the time and we were really nervous about the stinky body odor that was surely going to follow us around for a while.

We learned that eating a good, clean diet and drinking plenty of water can help cut down the BO, but sometimes you need a little extra help. We all know that the commonly used antiperspirants work pretty good for the most part, but that's if you don't care about all the aluminum that is being soaked into your body via the stinky armpits and how it prevents you from detoxing naturally through your sweat.

For those of us who care and want a more natural option... the choices are many, but very few actually work. Some even have aluminum and other yucky ingredients even though the product is supposed to be "natural".

I share this from personal experience, as a woman who rode (and still does when not pregnant!) horses, loves to work hard and likes a good sweat.

Sweat is not something I gross out about, but body odor... I do.


When Jon and I first threw away our conventional deodorants, we started out trying the Thai Crystal Deodorant Stone and it worked great... but for only a year or so before we started to really stink enough to try something different.

Out went that deodorant and in came the Crystal Body Deodorant... same idea as the first one, but supposedly better.

Same results... we still stunk like BO and it was getting really embarrassing.

Saved by the Powder
What were we gonna do?!  Sweat like a stinky horse?! Thankfully, I learned of a homemade version using baking soda, arrowroot or cornstarch and essential oils.

This powder deodorant saved us from the embarrassment of BO. It was kind of messy getting it on, but we weren't complaining!

We used it for a couple years, but just recently I decided to change it up and add in coconut oil because we were tired of getting powder everywhere.

After trying different variations... I had to make two different kinds. We found out the painful way that my hubby cannot have essential oils in his deodorant because it causes him to break out in a rash. As for me, I use essential oils with no problems... the rosemary is my favorite! Word of advise, try a small amount before making a batch to see if you can tolerate essential oils on your armpits.

Through that whole process I found that using plain coconut oil works fairly well. You can do that if you don't really want to make your own deodorant. My hubby did that for a while to let his pits heal up, but he felt like he need a little more power and so I made him a plain version of mine.

Try and see what works for you.


The Ingredients
I will share the powdered recipe along with the recipe for the solid form of deodorant below. Both work great, but we prefer the solid deodorant for obvious reasons.

A few things to keep in mind when making your deodorant... where we live is cool enough that we can keep the deo in a deodorant stick without worrying about it melting. If you are in an area where is it hot or concern about it melting... simply pour it into a small jar OR add a couple tablespoons of beeswax and/or shea butter. You will have to melt them all together using the double boiler method before adding in the dry ingredients and essential oils.

Essential oils... I highly recommend that you use a little bit of tea tree along with your favorite essential oil(s). The tea tree is anti-bacterial and paired up with coconut oil makes a nice double kick against the stinky odor-causing bacteria.

I like to buy all my ingredients from Mountain Rose Herbs, Amazon, Vitacost and/or Tropical Traditions. I know my essential oils shown in the pictures are not from Mountain Rose Herbs... they were gifts from friends and I appreciate them!

I have found that Mountain Rose Herbs' essential oils are of excellent quality... I still have some that I bought over 2 years ago and they work great!

Alright, enough chatter, let's get to work making...


Homemade Natural Deodorant that Works!

Solid Form:
6 - 8 Tbsp coconut oil (NOT melted)
1/3 cup arrowroot powder (or non-gmo cornstarch)
1/4 cup baking soda
essential oils (optional)
2 Tbsp beeswax and/or shea butter (optional)
  1. Mix arrowroot powder & baking soda together in a medium bowl.
  2. Mash in 6 Tbsp of coconut oil with a spoon until well mixed. It should be creamy with a slightly dry texture. If you need more, add 1 Tbsp at a time.
  3. Add in essential oils, if desired. You will need about 10 - 15 drops total for each batch.
  4. Store in a small glass jar or deodorant container (will need to melt gently first and pour in).
Favorite Essential Oil Combinations:
tea tree and rosemary
lavender and orange
lemon, lavender and frankincense
tea tree and lavender
yland yand and orange
peppermint and lemon

Favorite Single Essential Oils:
Tea Tree
Pine
Peppermint
Lavender
Rosemary
Frankincense

Extras:
-- Add 2-3 capsule of probiotics (pull the cap apart and add powder in with dry ingredients).
-- Use cocoa butter or mango butter instead of shea butter.

Powder Form:
6 Tbsp arrowroot powder
4 Tbsp baking soda
Essential Oils
  1. Mix arrowroot powder & baking soda in a small bowl.
  2. Add essential oils of your choice (recommended amount above).
  3. Store in a glass jar and use a blush brush to powder your armpits.

One More Thing...
Something to keep in mind, when you first start out using natural deodorant... your armpits are going to sweat a lot at first, but they will dry out over time has your body adjusts to being able to sweat naturally.

Remember, antiperspirants plug up your sweat glands and the natural deodorant is basically helping "unplug" them. Think of your glands all swelled up like little balloons with yucky toxics that need to get drained out.

So, don't freak out if you sweat a lot in the first couple weeks... that's a good sign that your body is detoxing and getting back to normal function!

Have you tried making your own deodorant with success? What are you favorite scents? Share below!

This post may contain affiliate links. If you purchase a product through an affiliate link, your cost will be the same but I will receive a small commission. The commissions I receive goes to support my family, our ministry and helps keep my blog going. Thank you for your willingness to use the links to support us & help me keep Just Making Noise going!


Read More
Posted in homemade, make it yourself, natural deodorant, natural living, natural remedies | No comments

mardi 7 février 2012

Make It Yourself ~Tangy Orange Powder

Posted on 14:02 by Unknown
Pin It


I am having too much fun taking pictures of these gorgeous orange chips and powder! The rich, sunny colors and beautiful, deep details just makes me want to keep clicking away!


Anyway...


I've already used this beautiful powder for a few things and have many more delicious plans for it! It smells like sunshine every time I open up the jar... hmm, must remember that when we have dark, rainy & cloudy days!


After dehydrating all those sunshine {orange} slices and enjoying them like chips and steeped in tea... I began to wonder if there were other ways to enjoy these yummy orange chips.


I googled around and came across this site that suggested to chop or grind the orange chips into powder, which can be used to flavor soup, fish, sauces or use has a garnish.


hmmm... interesting.


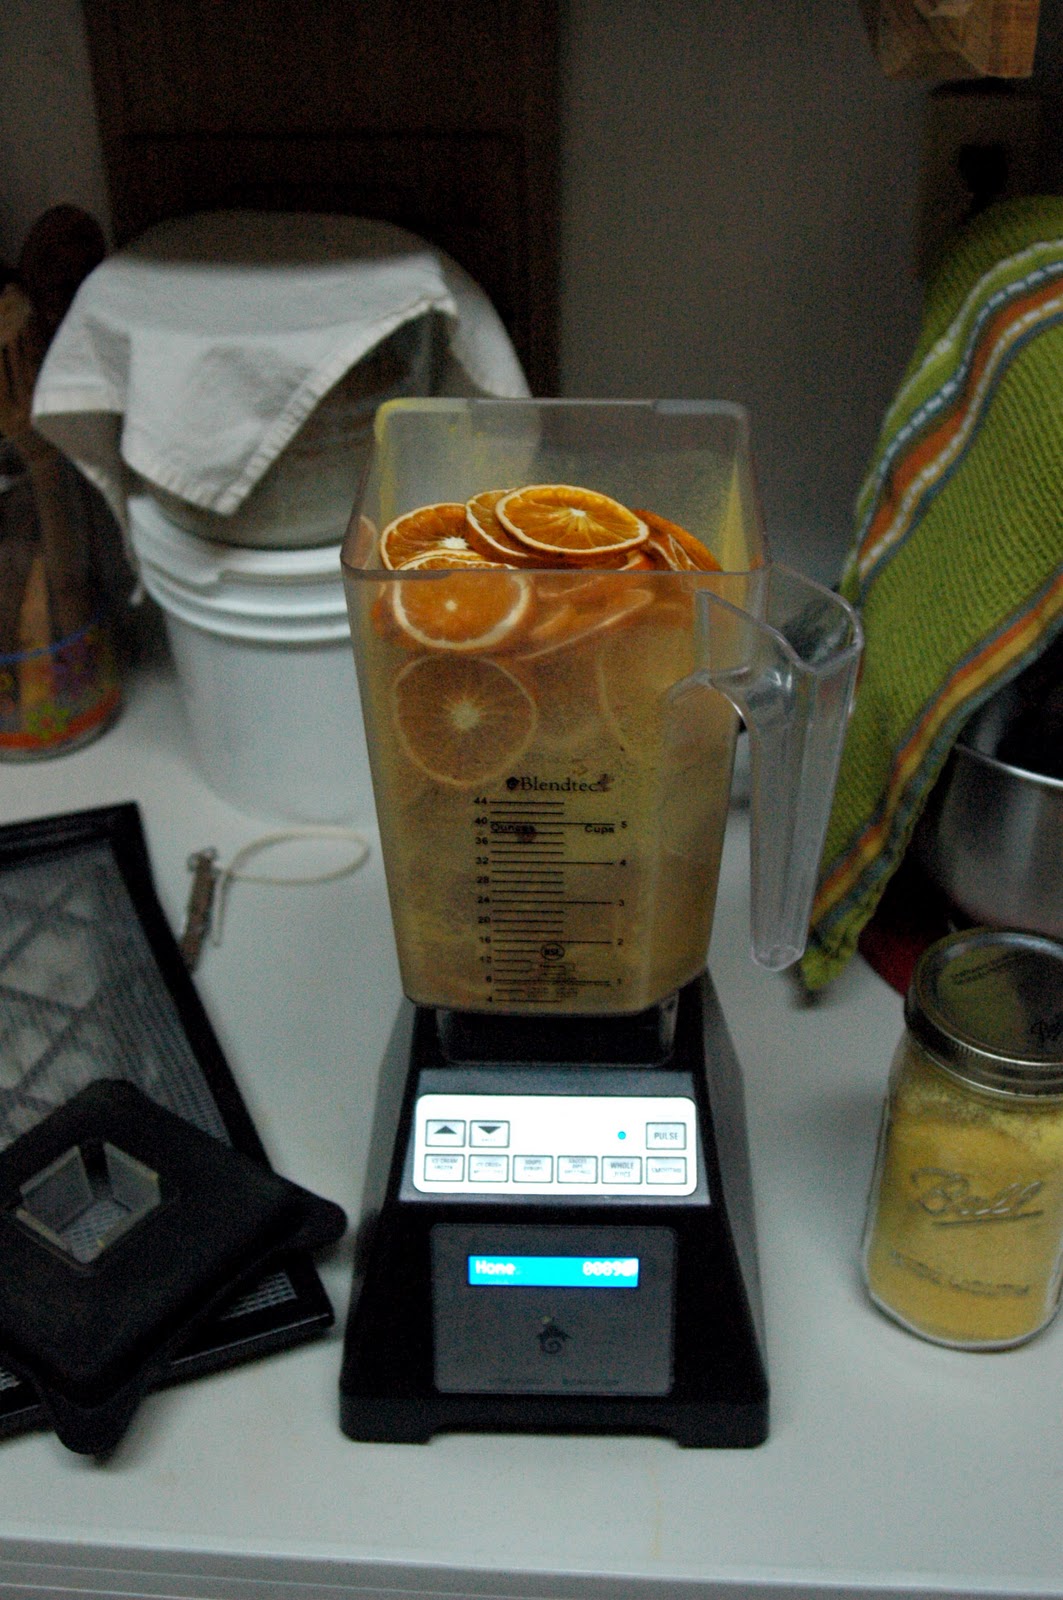
So, I threw in enough orange chips to fill my Blendtec and gave it a whirl... well, several whirls until it was powdery and smooth. It looks a little crumbly because of the natural oils from the rinds... simply wonderful!


I pour the powder into an airtight quart mason jar and kept throwing in more orange chips until I had almost 2 quarts full of tangy orange powder. And I still have about 1 1/2 gallons of orange chips to enjoy!


Ahh, lovely!


I have already used it to spice up cinnamon rolls, make drinks, give a tangy crunch to our favorite snack and more. I will {hopefully} be sharing these recipes soon!!


When you make these, make sure you store them out of direct light to protect the natural oils. They should last a long time  ;o)


Read More
Posted in dehydrated orange slices, dried orange chips, make it yourself, MIY, orange powder, orange season, oranges | No comments

lundi 27 juin 2011

Make It Yourself: Homemade "Perpetual" Vanilla Extract

Posted on 21:24 by Unknown


Finally, I made my own "perpetual" vanilla extract about 2 months ago and can't believe how EASY and CHEAP it was to make it! Really, I can't believe I waited this long to make my own vanilla. Crazy!


I'm sure most of you already know how to make your own vanilla extract. I knew how to do, but never tried to do it till 2 months ago. For a long time I was using up a big bottle of vanilla extract that I bought from Mexico when we lived there for a couple years. Then for the past 3 years, I've been asking mostly my mother-in-law to bring me pure vanilla extract from Trader Joe's whenever they visit.


Not anymore! Why pay more for store-bought vanilla extract when you can make your own for way less? All you need is 2 ingredients: vanilla beans and alcohol.


Yes, you will save a lot of money making your own vanilla extract. First, you can find good quality, organic vanilla beans for less than $2 at Mountain Rose Herb (use my link on the right sidebar, thanks!) or here on Amazon for a fantastic price! Second, you can get good, cheap alcohol from Trader Joe's or your local grocery store. Third, you need a jar or bottle to mix those two together for their "perpetual" marriage. I am using a flip-top bottle from IKEA that my mother-in-law got me a couple years ago, thanks MIL!


If you start now, you will have delicious homemade vanilla extract ready to go by the time Thanksgiving, Christmas and New Year roll around. You can even pour your homemade vanilla into cute little bottles and give them away as gifts to your friends and families, but don't stop there!


When I say "perpetual"... I mean forever, continuous, long-lasting and so on. When you are getting low, just pour more alcohol into the jar or bottle of vanilla beans and give a it a shake. The alcohol basically preserves the vanilla beans, making it last longer. The flavor will be just as intense. Whenever you use up a vanilla bean for something. Clean it up, add it into your bottle or jar of vanilla extract and top it off with more alcohol if needed! You can look around and remove any old, mushy ones whenever you put in a new bean, if needed.


Now,  here's a few things you should know before you head out to buy your vanilla beans and alcohol... The three most common types of vanilla are Mexican, Bourbon (or Bourbon-Madagascar) and Tahitian. Each has its own unique smell and flavor… Mexican is strong & spicy, Bourbon is bold & floral and Tahitian is lively & fruity


I bought my vanilla from Mountain Rose Herbs (link on the right sidebar) and love it! It doesn't say what kind, but it came from India... so my guess, it is most likely Bourbon. It smells and tastes so different from the pure mexican vanilla extract that I've used for so long.


Anyway, you can use non-organic vanilla beans, but I don't know if they are sprayed with chemicals or not. I would be safe and go with organic because you will be soaking it in alcohol which its design to draw out everything from the vanilla beans... so, using non-organic vanilla beans would not be wise because you don't want to be drawing out any lingering chemicals that might be on them. BUT if you are able to find research showing that non-organic vanilla beans are clean... sent it my way, please!

With the alcohol, the higher the proof, the better. I wouldn't purchase cheap, cheap vodka because it will taste cheap. I go for the mid-price ones. I like Absolute or Skyy... I also want to try making vanilla extract with rum, which they make here with sugar cane. 

NEW TIP: I learned a great tip from one of my readers that has proven to be extremely helpful. She shared that adding water will help extract some of the flavors that alcohol alone can't do. So, I've changed the recipe a bit and also increased it to give you measurements for a quart.

7/19/13 UPDATE: After making my perpetual vanilla extract for 2 years now I do not think there is much of a difference when you add water. I no longer add water to my vanilla extract and still enjoy it very much. PLUS, my vanilla beans are still going strong and they are the same beans I put in from this post!


Homemade "Perpetual" Vanilla Extract


10-12 vanilla beans
2 1/2 cups vodka, rum or bourbon
*3/4 cup pure, filtered water
1 quart glass jar or bottle


Slit the vanilla beans lengthwise, scoop out the bean goop and add them to the glass jar or bottle. Pour in your choice of alcohol & water, cover with lid and shake well. Place the jar or bottle in a cool, dark place for at least 2 months and shake it whenever you think of it. As time goes on the liquid will become darker and the smell & flavor will grow stronger.

Make sure to keep those vanilla beans covered at all times or they might get moldy.


When the vanilla extract is ready… use it like normal when baking. When your vanilla gets down to about half full, top it off with more alcohol and shake it up.


Yep, that’s all you gotta do! Just keep doing that and you will never run out of vanilla extract. Maybe once or twice a year, if needed, you can replace a couple of the beans when they are looking soggy and old.

Yep, that's all... told you it was easy and cheap! Now, go & get yourself some vanilla beans, cheap booze and you will be glad you finally did it... like me!


Read More
Posted in homemade vanilla, make it yourself, wholesome | No comments

mardi 17 mai 2011

Alternative Laundry 101 Series-Part 2: Natural vs. Chemical Laundry Detergents

Posted on 21:25 by Unknown
VS.


A couple weeks ago, I shared the 9 reasons why line-drying your laundry is all around healthier for you and the environment. Now I want to talk about what to use to clean the laundry with.


What we’ve been taught for so long, that we need to use chemicals to effectively clean our clothes, has never been the true or smart . Many natural soaps work as a great & cost effective replacement and will not pollute our bodies & the environment.


The chemical detergents (and all cleaning products) are full of toxin chemicals that quickly wear out your clothes, pollute the land & water sources, harm our animals, cause allergic reactions and damaging to our health. Have you ever wondered if your favorite laundry detergent is making you sick? Here are the 10 common ingredients you will find in any laundry detergent:

  • Phenols: Toxic, a suspected carcinogen and rapidly absorbed. Effects include swelling, pimples, and hives. Internal consumption can cause circulatory collapse, cold sweats, coma, and death.
  • Optical brighteners: These synthetic chemicals convert UV light wavelengths into visible light, which makes laundered clothes appear whiter (although does not actually affect the cleanliness of the clothing). They’ve been found to be toxic to fish and to cause bacterial mutations. Further, they can cause allergic reactions when exposed to skin that is later exposed to sunlight.
  • Linear alkyl sodium sulfonates (LAS): These synthetic surfactants are commonly listed as ‘anionic surfactants’ on labels, and are one of the most common surfactants in use. During their production process, carcinogenic and reproductive toxins such as benzene are released into the environment. They also biodegrade slowly, making them a hazard in the environment.
  • Petroleum distillates (aka napthas): These chemicals have been linked to cancer, lung damage, lung inflammation and damage to mucous membranes.
  • Phosphates: These chemicals are used to remove hard-water minerals to make detergents more effective, and to prevent dirt from settling back onto clothes during a wash. A major problem with them is that, when released into the environment, they stimulate the growth of certain marine plants, which contributes to unbalanced ecosystems. Many states have banned or restricted the use of phosphates for this reason, and you may see laundry detergents advertised as “low-phosphate” or “phosphate-free.”
  • Sodium hypochlorite (household bleach): This is a chemical precursor to chlorine, which is highly toxic and involved in more household poisonings than any other chemical. When it reacts with organic materials in the environment, carcinogenic and toxic compounds are created than can cause reproductive, endocrine and immune system disorders.
  • EDTA: Skin irritant leading to allergies, asthma, and skin rashes. EDTA is a class of compounds used as an alternative to phosphates to reduce mineral hardness in water, prevent bleaching agents from becoming active before they’re put in water and as a foaming stabilizer. EDTA does not biodegrade readily and can re-dissolve toxic heavy metals in the environment, allowing them to re-enter the food chain.
  • Artificial fragrances: Toxic effects on fish and mammals, often causes allergies, skin and eye irritation. Do not easily bio-degrade ain the environment.
  • Ammonia: Can cause burns, cataracts & corneal damage. Long term repeated exposure can cause bronchitis and pneumonia. Also has a toxic effect on plants, animals and fish.
  • Sodium Sulfate: It is corrosive and a severe eye, skin, and respiratory irritant. Can cause asthma attacks.


Makes you think twice before using detergent, yes? Read more here and here and here.


Did you know that companies who make laundry detergents are not required by law to list their ingredients?! They claim that their formulas are "confidential"... does that make you wonder what they are hiding? Now, please don’t be fooled by the “free & clear” detergents… they are still made with the same chemicals, just “free” of dyes and fragrances that often cause skin reactions and trigger headaches. Much like the fabric softeners I mentioned before.


With all that said, I use biodegradable & natural products to wash my laundry. I like knowing that my natural soaps contain ingredients from nature, not man-made chemicals. Over the years, I have tried many different laundry soaps… Charlie’s Soap, Earth Friendly ECOS, BioKleen, Ecover, Soap Nuts and many others. Be careful... not all natural soaps are really "safe and natural"! I learned that the hard way, for the past 4 years I’ve been using Charlie’s Soap mainly because I read from reviews that it was the best to use on cloth diapers. Yes, it did a great job of cleaning and not creating a scum that prevents the diapers from being absorbable... BUT I no longer use it for 3 reasons:

  • I learned from a friend that Charlie’s Soap is not entirely natural or safe like it says on their products and website. That really bothers me!
  • When Naomi was in diapers, she used to break out in HORRIBLE rashes from her diapers if I didn’t make sure to double rinse the diapers after washing them with Charlie’s Soap. If that stuff is supposed to be natural… why was it burning my little girl’s bottom?!
  • Since we moved to Central America, it hasn’t done a very good job washing our clothes and diapers in cold-water… especially hard water. Even when I add vinegar and baking soda to help soften the water, still no good.

      Now, I’ve switched over to BioKleen and found it did a way better job of cleaning our clothes and diapers. I am also using Soap Nuts... I love the fact that they grow on trees and are completely God-made, but I can't decide if they are really doing a good job of cleaning the laundry. I bought them because 1) they weight less then powder or liquid… 2) I read such great reviews about them and... 3) I got a really great price for 1,600 loads worth. I will keep using them and time will tell if they really do work or not!


      I'm sure most of you are wondering if your natural laundry soaps are really "natural and safe". These days there are so many different kinds of natural detergents out there that its hard to know what is good and what is simply a cheap imitation... here are 10 things I've learned to look for when buying GOOD natural laundry detergent:

      • 100% Non-Toxic and 100% Biodegradable – Helps protect the environment… most importantly... our water sources, lakes and streams.
      • Uses 100% natural and eco-certified ingredients – All natural ingredients plus testing by an independent agency that certain ingredients used are indeed ‘green.’
      • Uses only plant-based enzymes – Avoid animal-based enzymes and other animal ingredients (which can lead to unnecessary animal testing). More on the importance of enzymes coming up.
      • Butoxyethanol Free – Found in Charlie's Soap and most common laundry & cleaning products (source).
      • Petrochemical Free – Free from 1,4-dioxane (and all its derivative names) and NPE. You already know the health risks associated with these.
      • Phosphates and Sulfates Free – Free from phosphates and SLS/SLES (and other derivatives).
      • Derived from plants, vegetables, and natural food sources – Contains only natural food-grade ingredients.
      • Free from bleach, dyes, fragrances, optical brighteners, and masking agents – Only natural oils and food-grade ‘cleaning’ sources used.
      • Includes a plant-based fabric softener – No need for a separate softener (not necessary if using vinegar and/or baking soda).
      • Performs ideally in cold water and is safe for delicate fabrics and colors –Saves energy over hot water. Performs well regardless of fabric material and colors.

      Basically, you want to look for natural soaps derived from non-toxic plant-based and food-based ingredients. That's not always easy to find and often we might find out 1 or 2 years (or 4 years, in my case!) to late that the "natural" soap we've been happily using, isn't so natural... which is why I really want to like my Soap Nuts!


      I would also LOVE to make my own laundry soap, but have not found a recipe with ingredients that I can find here in Honduras. I know this would be the most frugal and easiest thing for me to do in the long run. Anybody got recipes to share with simple ingredients and no borax???


      Next, in Part 3... I will share with you how to use vinegar and baking soda for all your laundry needs!


      Tell me, what are you favorite natural soaps and why? Do you make your own laundry soap and is it effective?


      Don't forget... The Everything Beans ebook is on sale to all my noisy readers and check out the Against The Grain eBook Giveaway!!
      Have a great week y'all...
      Read More
      Posted in Alternative Laundry Series, family, homestead, homesteading, Honduras, Life, make it yourself, natural home alternatives, Other Things, simple tips | No comments

      mardi 10 mai 2011

      Make Your Own Sea Salt In 4 Easy Steps!

      Posted on 19:48 by Unknown


      Note: I don't know what happened, but this blog post disappeared sometime Friday and I had to retype half of the post... grr! Blogger better not eat up my posts again!

      Anyway, so sorry that I've been missing in action since last week! Things have been really busy with our first horse rescue and adjusting to having our friend coming to live with us for the next 3 months. For all those who enter the Everything Beans giveaway... I will post the winner sometime this week... at least I will TRY! LOL!

      Now, let's talk about salt...


      Some of you might remember my trip over to the Caribbean coast in Costa Rica over a year ago. Remember how I mentioned that I wanted to make sea salt with the ocean water I bottled up from there?


      Well, I did it!

      Right before we moved to Honduras... knowing that it would be ridiculous packing several bottles of ocean water in a box, hauling them across two borders and then having it wait around for me to finally do it. By then, it probably would've gone bad... can ocean water go bad? LOL!  I'm sorry it took so long to get this out of my "draft" folder and dust it off, but I'm sure you will see that it was worth the wait  ;o)


      I can't believe how easy it was to make it. In just four simple steps... you got crunchy sea salt right in your kitchen! Plus, it doesn't take a lot of time or work! I would love to do this again someday  :o)


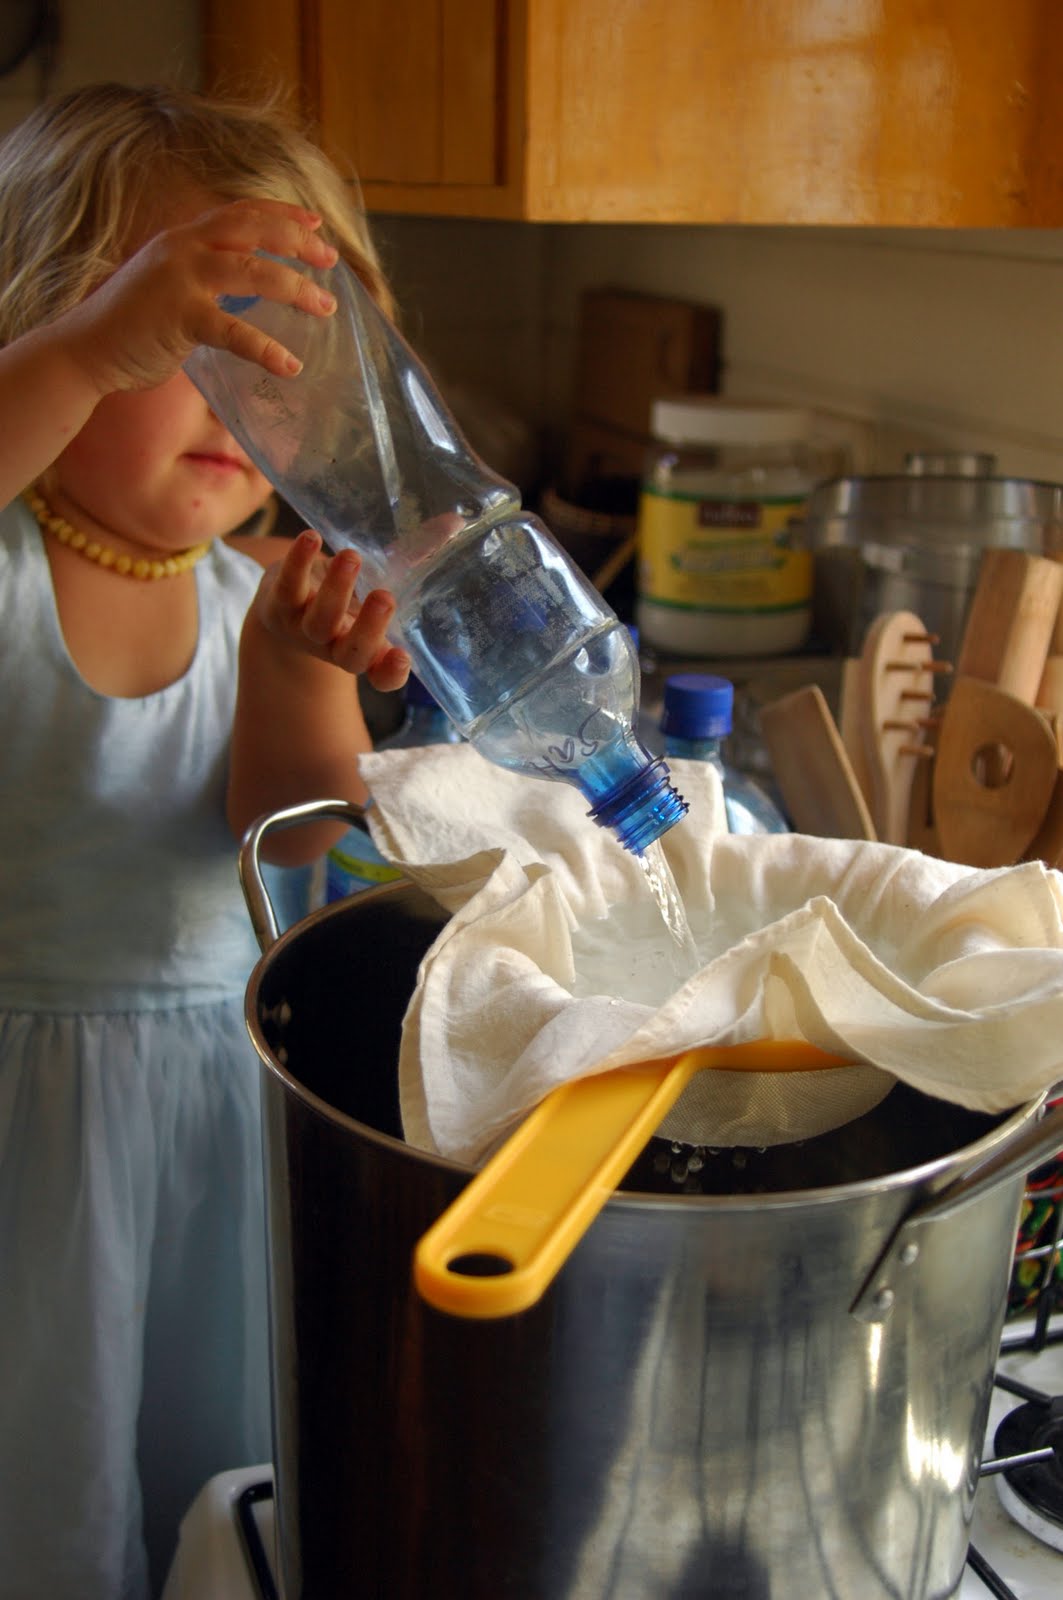
      Making your own sea salt is SO fun too! My oldest girl, Naomi, decided to get dress up when I asked her if she wanted to help me with the sea salt project. She looked so blue-tiful in her blue dress, it made her blue eyes stand out! I can't believe how much she has grown since these pictures... She's still my blue-tiful little baby  :o)


      So, let's start making some sea salt... shall we?


      1. Find a source of CLEAN ocean water near you and full up some bottles or buckets.
      Here we got several bottles of sea water that I collected while in Puerto Viejo last year. I had over 2 gallons of sea water total. Doesn't Naomi look great? LOL!


      And she has a fun sense of humor... just like her daddy! Goof-ball!


      2. Strain the ocean water.
      Now, you need to strain the sea salt through a muslin cloth in a colander OR you can use several layers of cheese cloth. You want to make sure to remove all the sand and debris from the sea water before boiling it. The water I collected wasn't very sandy or dirty at all... I was very surprised, but pleased  ;o)


      As you can see... Blue-tiful Naomi is very focus and doing an awesome job  ;o)


      3. Boil the ocean water.
      Bring the water to a boil and just let it boil away... evaporating all the water. It took a couple hours and make sure you stay close by! You don't want it to boil completely dry... it splatter everywhere. You will You don't want burnt sea salt, right?


      4. Sun-dry or dehydrate the sea salt.
      Now you will have thick paste-like sea salt sitting in your pot. You will need to allow it to dry in a shallow pan or cookie sheet in the sun for a day or two if it is warm and dry out. Otherwise you can stick it in your dehydrator on parchment paper for about 24 hours on low heat.


      Beware: If you have animals, make sure you put the salt where they can't get it. My dogs licked up about a third of it before I caught them! LOL!


      Here's Tabi helping us by "organizing" the bottles. Can't believe how much she has grown since this! Check out our recent family pictures to see my girls  :o)


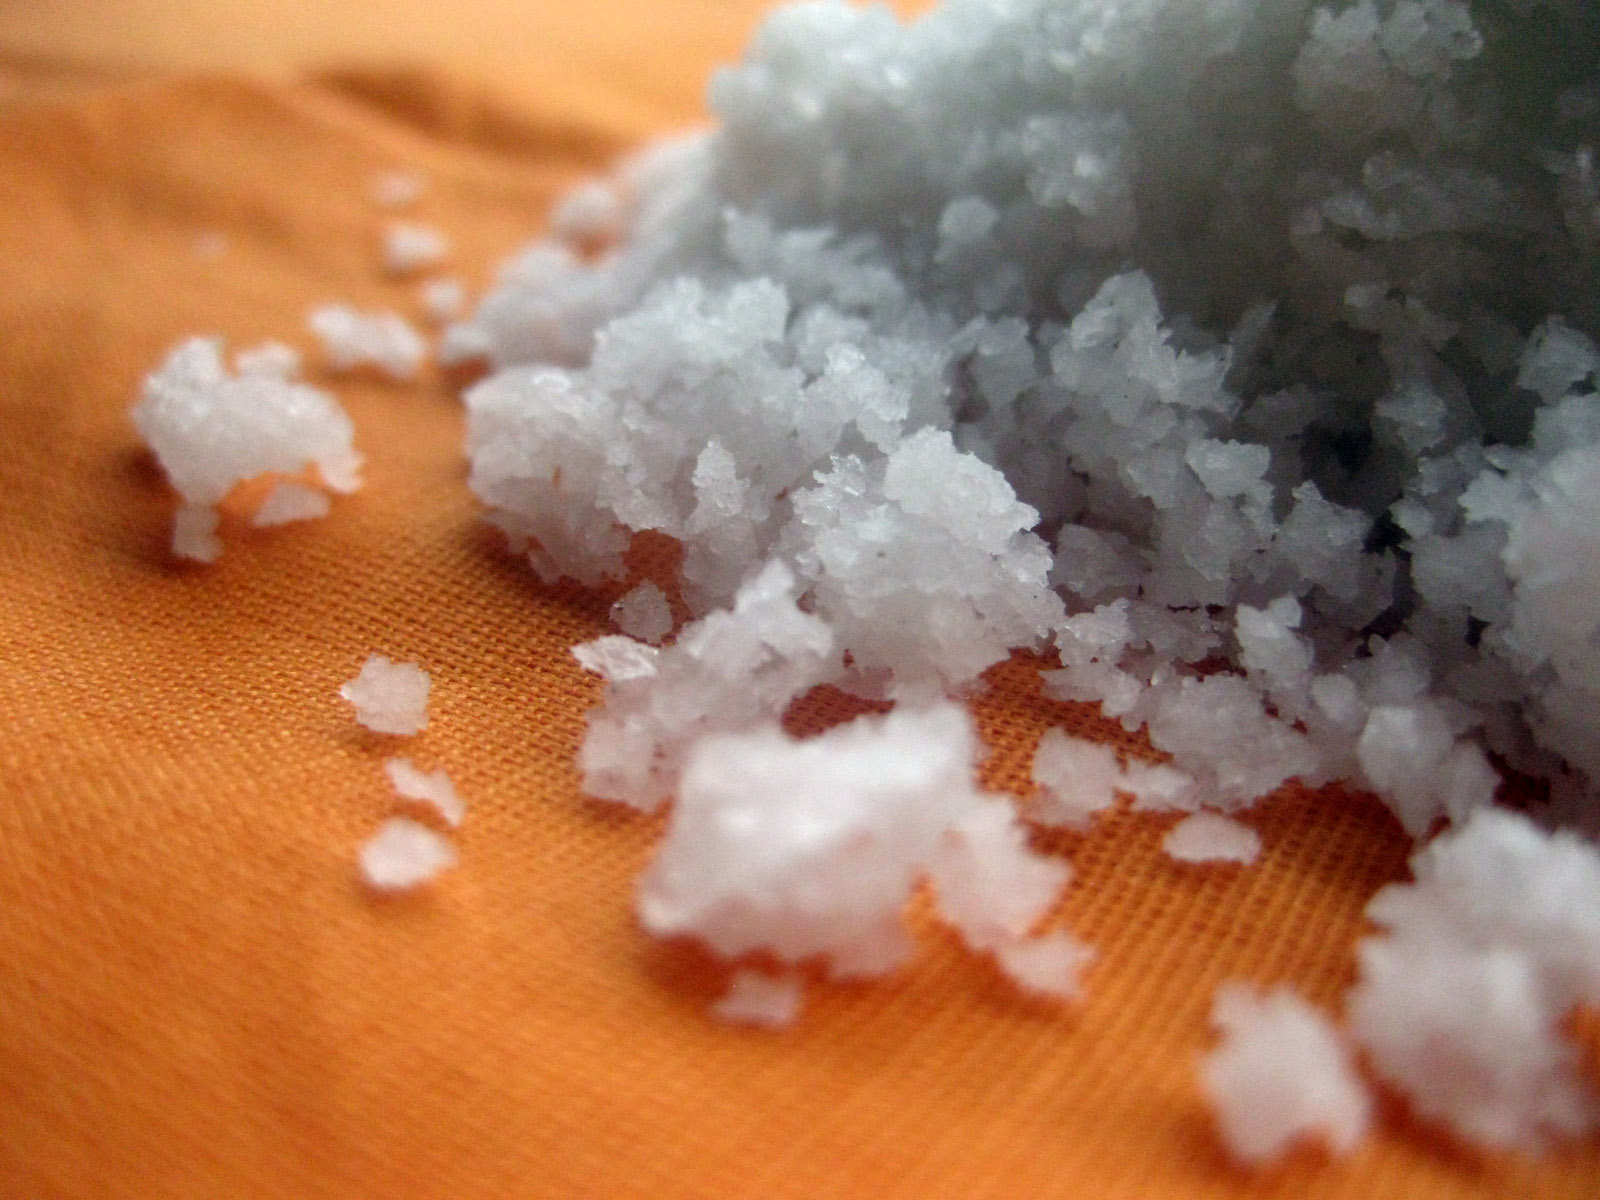
      Ta-da! You now have sea salt! How easy is that?! Store in a glass jar with a loose lid. I after all that, I got about 1 1/2 cups of sea salt... I would've had maybe over 2 cups if the dogs hadn't licked it up!


      Remember, don't expect the sea salt to be completely dry... it is normal for it to keep a little moisture. That's what real salt is supposed to be! I still have my special jar of homemade sea salt sitting on my shelf... waiting for me to use it!


      I'm sure you all are thinking... what does it taste like? texture? Well, it taste just like salt... only sweeter! Its nothing like the refined salt with its harsh taste. The texture is crunchy, almost flakey. I love it. I think it would be great to top it on cookies or something! Hopefully I will put my sea salt to work soon  :o)


      Here's some more fun salt pictures:


      Please share with me your ideas for the sea salt. What would you do with it?
      Blessings!
      Read More
      Posted in make it yourself, real salt, sea salt, Simple Lives Thursday, simple tips, wholesome | No comments
      Articles plus anciens Accueil
      Inscription à : Articles (Atom)

      Popular Posts

      • Pregnancy Notes: Postpartum Herbal Sitz Bath {recipe}
        Herbal sitz baths are extremely soothing, relaxing, healing  and a  great way to pamper a new mama after going through the tiring workout o...
      • About A Deaf Mama
        Ears to hear and eyes to see—both are gifts from the Lord. Proverbs 20:12 Hello! My name is Marillyn Beard and I am married to a wonderful G...
      • Contact
        Please contact me if you... Have any questions. Want to be a part of Sweet Wholesome Wednesday . Would like me to review a book or products ...
      • South Caribbean Adventures: The CHOCORART Chocolate Tour (Part 1)
        How's everybody doing today? Hope you all had a great day yesterday (Valentine's Day)! Have you been enjoying my posts about our Car...
      • Review & Giveaway: The Action Baby Carrier
        Thanks to the creators of the Action Baby Carrier, someone it going to come away from this giveaway with an awesome carrier! Thanks everybod...
      • 6 Ways to Eat More Raw Egg Yolks
        I love eggs. That gorgeous, golden egg in the picture came from one of my hens... that is what a healthy egg should look like! How many of ...
      • Four Herb Fritatas: Thin Egg Pancakes
        These mouth-watering "egg pancakes" is becoming our favorite way of preparing our eggs. So full of flavor and delicious as it is ...
      • Wish Cooking Healthy Food Was Simple?
        I am excited to share with you about GNOWFGLINS Fundamentals eCourse that will make preparing healthy food... simple and easy! Note: the en...
      • Coming Soon: Get 71 Harvest Your Health eBooks (plus MORE) for Only $37!
        THIS BUNDLE IS NO LONGER FOR SALE. Autumn is slowly coming in and the trees are showing off their beautiful shades of yellow, orange, purple...
      • Sourdough Journal #14 - Preserving Your Thriving Sourdough Starter
        Pin It Have a great  sourdough starter , but want to save some just in case it dies?  Want to give some to a friend that lives a few states ...

      Categories

      • 7 Day Real Food Challenge
      • adobe house
      • advent
      • agua de sandia
      • almonds
      • aloe vera
      • Alternative Laundry Series
      • apples
      • avocados
      • babies
      • babywearing
      • baked oatmeal
      • bakes oatmeal
      • beans
      • beef tongue
      • beef tongue recipes
      • Berkey products
      • birth DVDs
      • birth story
      • birthdays
      • blackberries
      • Blendtec
      • blog awards
      • body scrubs
      • bones
      • book reviews
      • books
      • Bookworm Reports
      • breakfast
      • breastfeeding
      • Bulk Herb Store
      • Bundle of the Week
      • busy life
      • butter
      • butter oil
      • butternut squash
      • Caribbean Adventures
      • chickens
      • chickpeas
      • childbirth books
      • chocolate
      • chocolate cake
      • chocolate peppermint cake
      • Christian books
      • Christmas
      • Christmas gifts
      • cinnamon
      • citrus fruit
      • cloth
      • cloth diapers
      • cloth pads
      • cloth wipes
      • coconut flour
      • coconut oil
      • coconut palm sugar
      • coconuts
      • comfort food
      • cookbooks
      • cookies
      • cranberries
      • crock pot
      • cultured dairy
      • curd
      • curd bars
      • dairy-free
      • deaf
      • December Photo Project
      • December Photo Project 2011
      • dehydrated orange slices
      • dehydrating sourdough
      • dehydrator
      • desserts
      • diary-free
      • dried orange chips
      • easy frosting
      • ebook
      • eBook Bundle
      • ebook discount
      • egg yolks
      • elderberries
      • essential oils
      • fall recipes
      • family
      • FAQs
      • farmer's markets
      • fermented cod liver oil
      • Fight Back Fridays
      • filtered water
      • fluoride
      • food news
      • Foodbuzz
      • foodie fights
      • Foodista
      • free stuff
      • frugal meals
      • frugal snacks
      • garbanzo beans
      • gardening
      • garlic
      • giveaways
      • gluten-free
      • GMOs
      • GNOWFGLINS Dehydrating Class
      • GNOWFGLINS e-Course
      • grain-free
      • group b strep
      • guest post
      • handmade
      • Harvest Your Health Bundle Sale
      • He is risen
      • healthy fats
      • healthy nuts
      • healthy postpartum
      • Hello Morning Challenge
      • herbal medicine
      • herbal remedies
      • herbal sitz bath
      • herbs
      • homebirth
      • homemade
      • homemade candy
      • homemade cereal
      • homemade chorizo
      • homemade extracts
      • homemade mayonnaise
      • homemade snacks
      • homemade snacks. traveling
      • homemade sourdough tortillas
      • homemade tea
      • homemade trail mix
      • homemade vanilla
      • homemade wipes
      • Homemaking eBook Bundle Sale
      • homeopathy
      • homestead
      • homesteading
      • Honduras
      • honey
      • honey-sweetened
      • horchata
      • ice cream
      • ice cream pie
      • Italian Drip Sandwich
      • Jesus
      • JMN videos
      • Just Making Ice Cream
      • kefir
      • kelp
      • kitchen gadgets
      • labor and birth
      • lacto-fermented food
      • Life
      • life in Costa Rica
      • life in Honduras
      • limes
      • loose herbs
      • make it yourself
      • mangos
      • marmalade
      • missionaries
      • missionary life
      • MIY
      • movie
      • mud house
      • muffins
      • my faith
      • my family
      • my story
      • Naomi
      • natural birth
      • natural deodorant
      • natural drinks
      • natural home alternatives
      • natural living
      • natural nipple cream
      • natural postpartum care
      • natural pregnancy
      • natural preventative care
      • natural remedies
      • natural sweeteners
      • naturally sweetened sweets
      • Nourished Kitchen e-course
      • Nourished Living Network eBook Bundle
      • nourishing ingredients
      • nourishing ways
      • nursing
      • nursing tea
      • nut & seed
      • nut-free
      • oatmeal
      • oatmeal bake
      • odd bits
      • orange powder
      • orange season
      • oranges
      • Organics in Costa Rica
      • organize
      • Other Things
      • paleo/primal eBooks
      • palm shortening
      • pancakes
      • pecans
      • Pennywise Platter Thursday
      • peppermint
      • perserving naturally
      • photography
      • phytic acid
      • pie crusts
      • Poema
      • popsicles
      • porridge
      • postpartum books
      • potpourri
      • prayer needs
      • pregnancy
      • pregnancy books
      • pregnancy exercises
      • pregnancy health
      • Pregnancy Notes Series
      • pregnancy tea
      • preserving sourdough
      • preventing group b strep
      • probiotics
      • pumpkins
      • quiet time
      • raw apple cider vinegar
      • raw food
      • raw milk
      • Real Food
      • real food article
      • Real Food Face-Off
      • Real Food Media
      • Real Food Wednesday
      • real salt
      • recipe round-up
      • recipes
      • restaurant reviews
      • reviews
      • RO4Y
      • rolled oats
      • sea salt
      • simple life
      • Simple Lives Thursday
      • simple tips
      • slow cooker
      • smoothies
      • soaked nuts
      • soaking grains
      • soaking nuts
      • soups
      • sourdough
      • sourdough biscuits
      • sourdough cake
      • sourdough cinnamon rolls
      • sourdough cookies
      • sourdough cornbread
      • sourdough eCourse
      • sourdough english muffins
      • sourdough focaccia
      • sourdough journal
      • sourdough pizza
      • sourdough pot pie
      • sourdough starter
      • special guests
      • spirulina
      • stevia
      • sugar-free
      • superfood for pregnancy
      • supplements
      • Sweet Wholesome Wednesday
      • Tabitha
      • tea
      • thankfulness
      • Tobias
      • top posts
      • tortilla pizza
      • traditional food
      • travel snacks
      • traveling
      • Tuesday Twister
      • tutorial
      • Tyndale book reviews
      • Ultimate Homemaking Bundle Sale
      • walnuts
      • WAPF
      • WAPF food
      • Weekend Herb Blogging
      • whole food supplements
      • whole grains
      • wholesome
      • wholesome cookies
      • wholesome eating
      • wholesome snacks
      • wholesome sweets/desserts
      • winners

      Blog Archive

      • ▼  2014 (12)
        • ▼  mai (3)
          • Pregnancy Notes: Postpartum Herbal Sitz Bath {recipe}
          • Pregnancy Notes: DIY Natural Nipple Cream {recipe}
          • Making the Adobe Bricks
        • ►  avril (7)
        • ►  janvier (2)
      • ►  2013 (50)
        • ►  décembre (1)
        • ►  novembre (3)
        • ►  octobre (7)
        • ►  septembre (3)
        • ►  août (4)
        • ►  juillet (2)
        • ►  juin (3)
        • ►  mai (8)
        • ►  avril (5)
        • ►  mars (6)
        • ►  février (5)
        • ►  janvier (3)
      • ►  2012 (41)
        • ►  décembre (6)
        • ►  novembre (3)
        • ►  octobre (1)
        • ►  juillet (6)
        • ►  juin (6)
        • ►  mai (4)
        • ►  avril (1)
        • ►  mars (2)
        • ►  février (5)
        • ►  janvier (7)
      • ►  2011 (82)
        • ►  décembre (19)
        • ►  novembre (1)
        • ►  septembre (2)
        • ►  août (7)
        • ►  juillet (9)
        • ►  juin (9)
        • ►  mai (11)
        • ►  avril (13)
        • ►  mars (4)
        • ►  février (4)
        • ►  janvier (3)
      • ►  2010 (30)
        • ►  décembre (1)
        • ►  avril (5)
        • ►  mars (3)
        • ►  février (19)
        • ►  janvier (2)
      • ►  2009 (137)
        • ►  décembre (21)
        • ►  novembre (16)
        • ►  octobre (14)
        • ►  septembre (11)
        • ►  août (17)
        • ►  juillet (12)
        • ►  juin (19)
        • ►  mai (13)
        • ►  avril (9)
        • ►  mars (5)
      Fourni par Blogger.

      Qui êtes-vous ?

      Unknown
      Afficher mon profil complet