eight weeks pregnant

  • Subscribe to our RSS feed.
  • Twitter
  • StumbleUpon
  • Reddit
  • Facebook
  • Digg

samedi 31 mars 2012

Tyndale Book Review & Giveaway: Miracle For Jen

Posted on 06:21 by Unknown


Miracle for Jen is an amazing testimony to the fact that God truly wants to be intimately
involved in our lives and really does work the bad things out into good things if we choose
with everything we are to believe and trust Him.


I am reminded, as I read about this family's extreme trails, that this world is just for a moment and then Eternity. Jen Barrick’s greatest desire was for every aspect of her to be surrendered to God for His purpose and use. She meant it when she prayed it and God took her at her words and answered her prayers in a way that might look crazy and awful to most of us, but to Jen Barrick, it was the answer she had prayed for.


Written from her mother’s perspective, who was also devastated by the automobile
accident, she does not hold anything back as she describes her own bitterness and anger
toward God and the man who drunkenly crashed into their van changing their lives forever.


However, the impact that Jen ultimately has on every person she comes in contact with,
including her own family, cannot be denied. However you may feel about God, Jen’s testimony cannot be taken from her or negated. If you have ever asked God “why”, this is a book you must read! As I closed the book on the last page, I realized how selfish I get in my own little world and how much more God wants for me and from me.


Life is not about me!


I truly believe that many, if not every person, should read this extraordinary, inspirational and thought-provoking book. It will cause you to want to desire what Jen desired, but don't walk away and forget about it! Be the miracle God wants you to be!


Giveaway
Tyndale has given me one gift certificate to giveaway! Simply follow my blog and leave a comment below stating that you are you following or already following.


PLEASE include your email address for me to contact you!


Winner will be chosen April 3rd via random.org and will be contacted (if there's an email address). The winner will be required to give me their address for me to send the certificate.


I am not being paid or commissioned for this review. Just given a copy of this book for review and personal use.


Read More
Posted in book reviews, Bookworm Reports, Christian books, giveaways, Tyndale book reviews | No comments

mercredi 7 mars 2012

My Missionary Life Story: The Unexpected Journey of Faith, Trust & Simplicity

Posted on 20:45 by Unknown


Everybody has a role model in their life that they look up to, learn from and follow in their steps. if I asked you who your role model is for what living simply is all about… what would be your answer? Your local farmer? Joel Salatin? Michael Pollan? Mother Teresa? The Amish?

Want to know my answer? Jesus Christ.

Jesus, God, came into this world as a babe in a humble, dirty stable through a simple girl named Mary. His birth celebrated by the shepherds and 3 wise men. He grew up loving the Laws of God. He was the carpenter’s son. Learned to make a honest wage to provide food for the family. He was described as simple in looks and attire. He raised up 12 uneducated men to walk alongside Him and learn from Him. He purposed daily to get away and spend time alone in prayer. He taught with all wisdom and authority. He showed power & strength through humility before His enemies. He kept His promises.

He lived simply… yet His life speaks powerfully to us today. His life is teaching you and me to choose to live a simple life not caught up in the world.

Through Him, I am learning that a simple life is accepting what I have and making the best of it rather then wishing for what I don’t have or can’t have.

Through Him, I am learning that a simple life is holding loosely to my plans and allowing God to make the final changes and direct my steps.

Through Him, I am learning that a simple life is living now, in the moment, with my family and living joyfully in all circumstances.

Through Him, I am learning that a simple life means to be humble and righteous in all that I do.

Through Him, I am learning that a simple life involves hardships, persecution and suffering.

Through Him, it means to take up the cross… sacrifice my life, my plans, my comforts, my stuff…  and follow Him.


Pin It

The Unexpected Journey
It has been over four years since we boarded the airplane in Chicago, bound for Costa Rica, with only 21 pieces of luggage & trunks that carried what was left of everything we had. We sold everything that would not fit in those trunks and suitcases.

That was the start of learning to let go of “stuff” and have less. I struggled going through all our possessions and deciding what we didn’t need to take with us. Now, I don’t even remember what those things were. I look back and remember how freeing it was to get rid of it all!

"I know how to live on almost nothing or with everything. I have learned the secret of living in every situation, whether it is with a full stomach or empty, with plenty or little. For I can do everything through Christ, who gives me strength." Philippians 4:12-13

We arrived thinking the vision for RO4Y would begin in Costa Rica, but it was just a time for God to prep us for Honduras. At the time we didn’t know that, but now we do. Honestly, if the Lord brought us straight to Honduras… I don’t think we would’ve stayed long. He knew that. He knew what we could and couldn’t handle at the time.

Now, It has been two years since we once again thinned down our possessions, loaded to the max our bus & my dad’s F-250, drove across two borders from Costa Rica to Honduras and began the wild journey of learning to trust, believe and live by faith simply in God’s hands.

If God sent an angel four years ago to tell me that my husband & I will be missionaries in a rural area of Honduras, with 3 kids and this angel gave me the details of everything that was going to happen to us in the past 4 year span...

My response would have been nothing like Mary’s.

"I am the Lord's servant. May everything you have said about me come true" Luke 1:38

My response would have been more like…

“Lord, I am never doing that! Can you find someone else? I can’t do that, I’m just a deaf mama. I don’t want to do that… I just want to have a simple life with a nice little house in New Mexico, a car that will get us around, a church where we can fellowship and the comforts of living in USA.”

Yeah, I am ashamed to say that would’ve been my response.

Since we moved to Honduras… God has brought us through fire to refine us, increase our faith in Him and make our life simpler so we can serve Him freely.

I was pulling ticks off my family everyday; showering with a garden hose outside; using a poorly built outhouse as a toilet; sharing a very small 3 bedroom Honduran mud-brick house with my parents; dealing with: animals coming through the roof & eating our food, a leaking roof and regular power outages; fighting against the termite swarms; killing 30+ flies a day; worrying about the health of my family; adjusting to difficult cultural changes and dealing with the cultural shock lasted through the first year of our life in Honduras.

Through it all… I learned to accept it, but I wearily wondered why God chose me for this role. Wondered if this simple life was really going to work for us. Wondered how I could handle all of it. God promised never to give me anything I couldn’t handle but I sure felt like I couldn’t handle this.

Why did He trust me so much?

I am learning to understand that it is not about how much He trusts me. It was about how much He trusts the work He has done in me. Preparing me for this simple life in rural Honduras.

I probably had more emotional breakdowns & tears that year than in my whole life. Through that dark and lonely time in my life… the Lord spoke to me through these verses:

“Have you never heard? Have you never understood? The Lord is the everlasting God, the Creator of all the earth. He never grows weak or weary. No one can measure the depths of his understanding. He gives power to the weak and strength to the powerless. Even youths will become weak and tired, and young men will fall in exhaustion. But those who trust in the Lord will find new strength. They will soar high on wings like eagles. They will run and not grow weary. They will walk and not faint” Isaiah 40:28-31

“My grace is sufficient for you, for my power is made perfect in weakness.” 2 Corinthians 12:9

“Peace I leave with you; my peace I give you. I do not give to you as the world gives, Do not let your hearts be troubled and do not be afraid.” John 14:27

What really threw me into a turmoil was going from having access to a beautiful, huge farmer’s market in Costa Rica where the rich, organic bounty came from local farmers to an ugly, tiny spot on the ground they called a market in Honduras where the chemical-laden produce come in mass quantities from the city, not from local farmers.

Health is important to me. We truly believe that taking care of our bodies is essential to living life to the fullest for the Lord. How can we if we are distracted by sickness from eating bad food all the time? For me to go from buying 90% organic or clean food to less than 5% was a shock, but I learned to accept it… with tears and despair.

Why did God ask me to sacrifice so much?

So that He will get all the glory. God knows our situation and our heart’s desire to be healthy, live simple and fully… he has blessed that desire above and beyond what I thought was possible. No, we did not find organic or clean food, but He gave me a deep peace that helped me accept what I couldn’t have.

“So don’t worry about these things, saying, ‘what will we eat? What will we drink? What will we wear?’ These things dominate the thoughts of unbelievers, but your heavenly Father already knows all your needs. Seek the Kingdom of God above all else, and live righteously, and He will give you everything you need. So don’t worry about tomorrow, for tomorrow will bring its own worries. Today’s trouble is enough for today.” Matthew 6:31-34

"Consider it pure joy, my brothers and sisters whenever you face trials of many kinds, because you know that the testing of your faith produces perseverance. Let perseverance finish its work so that you may be mature and complete, not lacking anything." James 1:2-4


Embracing my Life
Into the second year, one beautiful morning, the Lord spoke to me. Not with thunder, but with soft breeze of a whisper.

My child, embrace the life I’ve given you!

That was the turning point for me. Not just to accept my life, but to embrace it with joy and victory. Embrace the hardships & simple life as a missionary alongside my Man and raising my 3 kids in rural Honduras.

I love that word… embrace!

Walking in Thankfulness
Next, came the realization that I needed to have the attitude of thankfulness.

To be thankful for the things that I most often complain about… the house we live in, the hardships and the discomforts of life as a missionary.

"Be thankful in all circumstances, for this is God’s will for you who belong to Christ Jesus." 1 Thessalonians 5:18

"Let your roots grow down into him, and let your lives be built on him. Then your faith will grow strong in the truth you were taught, and you will overflow with thankfulness." Colossians 2:7

Instead of wasting energy fighting against God with my complaints, lack of contentment and trying to make things happen the way I want it to happen. I am now choosing to look through eyes of thankfulness. It isn’t always easy, but it is easier than fighting!

Well Done
It has been my heart’s desire that when I bow before the throne of the Lord, I will hear the words richly flow over me and into my healed ears, “Well done, my good and faithful servant”.

That alone will make everything I’ve gone through in this life worth it.

Is that your heart's desire too?


Read More
Posted in family, Honduras, Life, missionaries, missionary life, my faith, my story, simple life | No comments

jeudi 16 février 2012

Sourdough Journal #14 - Preserving Your Thriving Sourdough Starter

Posted on 21:12 by Unknown
Pin It


Have a great sourdough starter, but want to save some just in case it dies? Want to give some to a friend that lives a few states away? Need a long break from making sourdough or planning a long vacation this coming summer?


Dehydrating your starter is the way to go. 


Having dehydrated starter will come in handy "just-in-case" your fresh starter suddenly stops working, a family member (not familiar with your healthy, fermented food collection) tosses out your lively starter thinking it was food gone bad, a friend wants to try making sourdough (dried starter less messy to ship ~wink~), everybody is growing tired of sourdough (hope that doesn't happen with us!) or you are planning a month or two away from home.


These are many good reasons to preserve your sourdough for those "just-in-case" moments!


Storing your starter in the fridge is a good, simple solution for short vacations and weekly breaks, but when you need to store your starter for longer periods... dehydrating is the best way to go.


Its easy!


If you don't have a dehydrator... don't sweat it. You can do it without one!


I did this back before we left for our 2 1/2 month trip stateside and I'm so glad I did! I made the batch of dehydrated starter, but also left a small amount of live starter in a jar in the back of the fridge.


Well, guess what we found when we got back? Yep, an explosion... cracked jar with dried/wet, moldy starter all over the back of my fridge. I thought I let it settle down enough (dormant) before tightening the lid, guess not! It was truly a pain to clean up.


But I didn't worry because I had my dried starter in the freezer. I mix it up with some water and had a thriving sourdough in 2 days! Sweet!


Dehydrating Your Starter
All you need is:

  • 1/4 - 1/3 cup of mature, thriving sourdough starter, fed within the last 12 hours (Allow the starter to build up before drying it out to be at a maximum level. I dehydrated mine after I fed it and left it alone for about 5 hours)
  • Parchment paper or non-stick dehydrator sheet
  • Dehydrator tray or baking sheet
  • Dehydrator (optional)

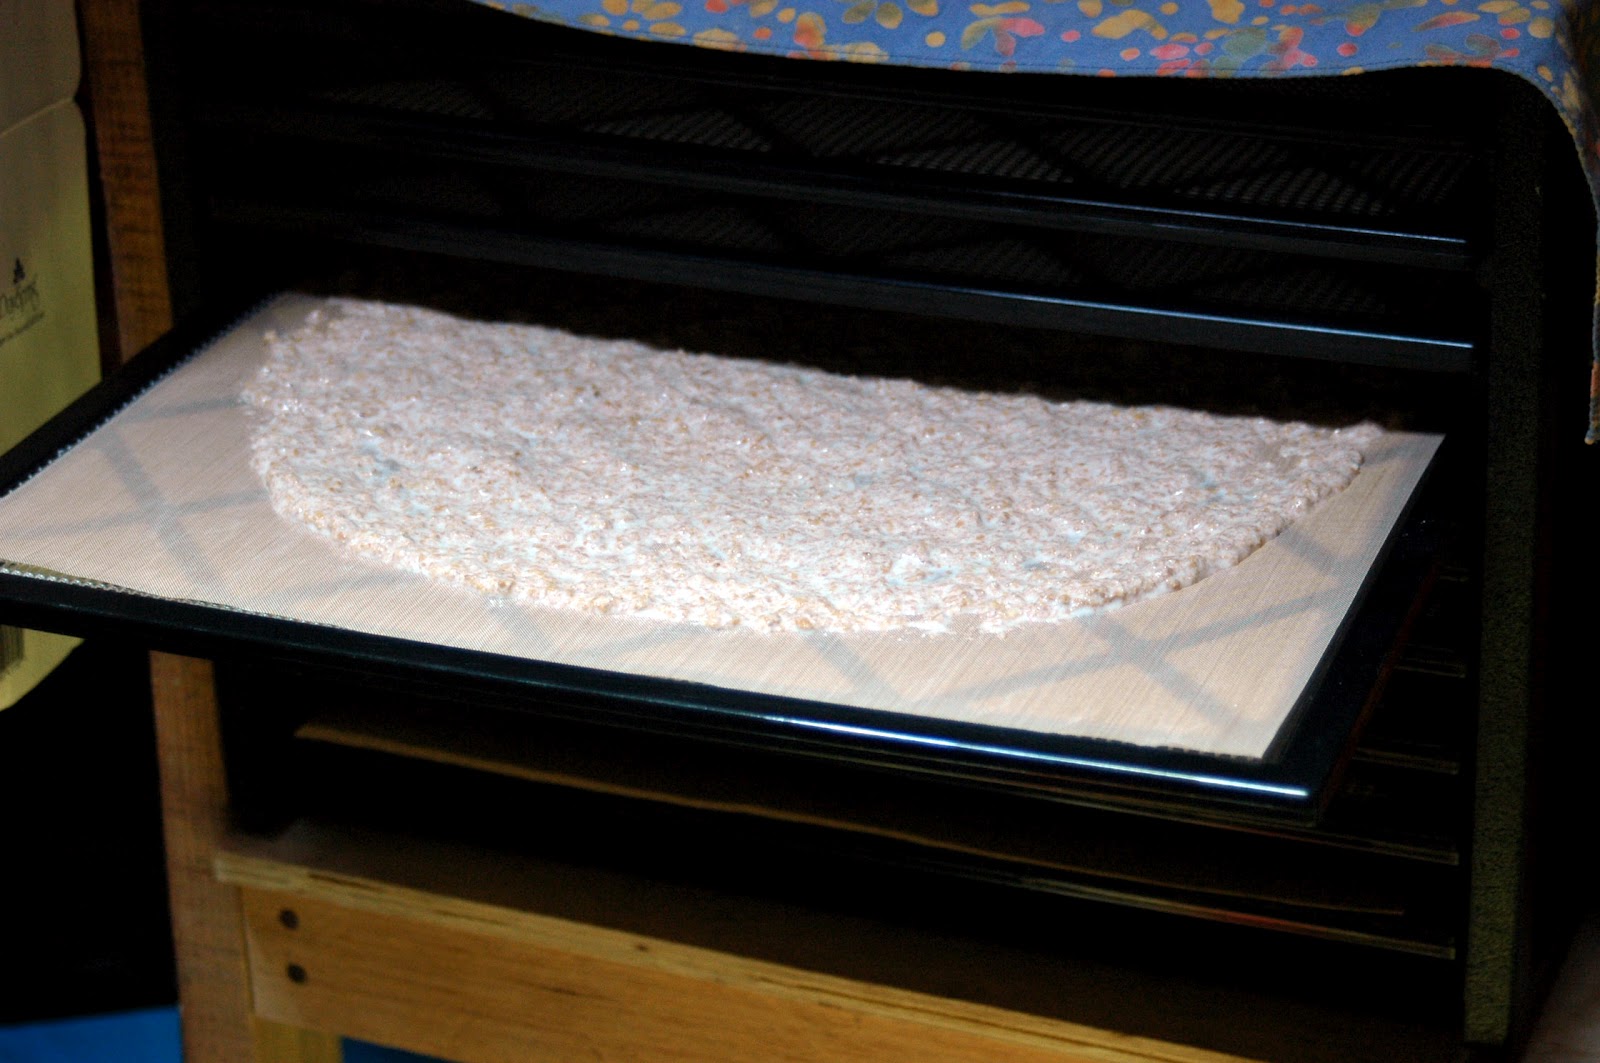
Place the parchment paper on the dehydrator tray or baking tray. Spread starter in a very thin layer on the parchment paper. You can dry your starter in one of two ways:


In room temperature. Dry your starter in a clean area, at room temperature (between 70 to 80 degrees F) until dry. When it develops a dray skin on top, cover with a light cloth to keep dust and bugs off. If temps are much lower than the 70s, mold may be an issue. If temps are much higher than the 80s, the organisms may die.


In dehydrator. Put tray in dehydrator and turn the dial so that it is just barely turned on. Dry for about 6 to 10 hours, depending on thinness of the starter. Check it often if you can.


Now, when your starter is crispy dry... break into smaller pieces (you will now have "starter flakes" and transfer to a freezer bag or container. Store in freezer for up to a year (according to Sourdough A to Z eBook). We don't know for sure how long a dehydrated starter will last, but it would be best to repeat the process yearly with fresh starter.


That said, I'll most likely be dehydrating a batch of my starter every August! Better safe than sorry!


Rehydrating Your Starter
Mix together 2 hefty tablespoons of dehydrated starter flakes and 1/3 cup of water into a clean, quart size jar or medium/large glass bowl. Mix well. Allow the flakes to soften for about 5 minutes.


Add 1/3 cup of whole wheat or your choice of flour and mix vigorously. Get as much air into it as you can. Cover with a cloth towel and place in a warm area or room temp area for about 24 hours. The warmer the temperature, the quicker it will rehydrate and bubble up. Don't let the temps go beyond 85 degrees F if you can help it. The mixture may or may not be bubble after this first step, but don't stop there!


Mix in 1/2 cup water and 1/2 cup flour. Mix vigorously to get air in. Cover and return to a warm spot for 12 hours.


Repeat this process every 12 to 24 hours until the starter is light and bubbly with a nice sour smell.


Now you should have a reactivated starter!


Your starter is considered reactivated when it continues to get light and bubbly for at least 3 good feedings. In cooler areas (like mine!), it may take longer... up to several days. But I did say up there that is was thriving after 2 days and this was during a very cool & rainy time in my area. My starter must have been very strong!


Now, go get your stuff together and get some starter preserved! Better now, then have regrets later  :o)

300x225


Read More
Posted in dehydrating sourdough, preserving sourdough, sourdough, sourdough eCourse, sourdough journal, sourdough starter | No comments

mercredi 8 février 2012

14 Reasons Why I HEART Blendtec Over Vitamix & Valentine Special!

Posted on 21:29 by Unknown


Valentine Special:
Through February 14th, you can get $40 off the purchase of their newest edition... the Twister Jar. This is the lowest price ever for this amazing jar! The Twister Jar can create extra-thick blends like nut butters, hummus, baby food, dips, dressings, thick shakes and more! Compare peanut butter in the FourSide Jar (4-5 minutes) vs. the Twister Jar (35-45 seconds). The jar can be loaded up to a full 16 oz., which is incredible for dense ingredients. These jars normally sell for $129, but get it today for only $89! Of course, if you don't have the blender base... read on.

Over 2 years ago I was blessed (and thrilled!) to receive Blendtec to review and compare it to  Vitamix.

I had been using Vitamix for about 3 years and it did pretty well and I was, for the most part, happy with it… until I got Blendtec.

Since Blendtec arrived, I have retired Vitamix and don’t miss him one bit! Sorry Vitamix!


Below I am going to share my fourteen reasons, yes 14 (why does it have to be 10 like everybody else?!), why you should have Blendtec helping you in the kitchen.


14 Reasons Why I HEART Blendtec
So easy to clean. The whole thing is a breeze to clean! The buttons don't have cracks and the motor base can be wiped down easily with a wet cloth. The wide square base of this blender makes cleaning so much easier then Vitamix. You can toss it in the dishwasher or put in a couple drops of soap with water and pulse a few times, then rinse and dry it!
Nothing gets stuck at the base. It really bothered me whenever food would get stuck at the base of my old Vitamix, especially in the corners where I couldn't get it with the stick. I would have to turn it off and take a knife or thin spatula and scrape it around to get it moving again. With Blendtec, you can be assured that nothing will get stuck at the base because of its wide square base!

Functions like a food processor. I often make homemade salsa, chopped or pureed… depending on what I want. You can throw in any fruit or veggie and pulse for a few seconds to get it nicely chopped. Honestly, though, I still like my CuisineArt food processor and think it does a better job with some things like homemade mayo! Blendtec also makes wonderful soup very simply & smoothly… much like Vitamix, but better.

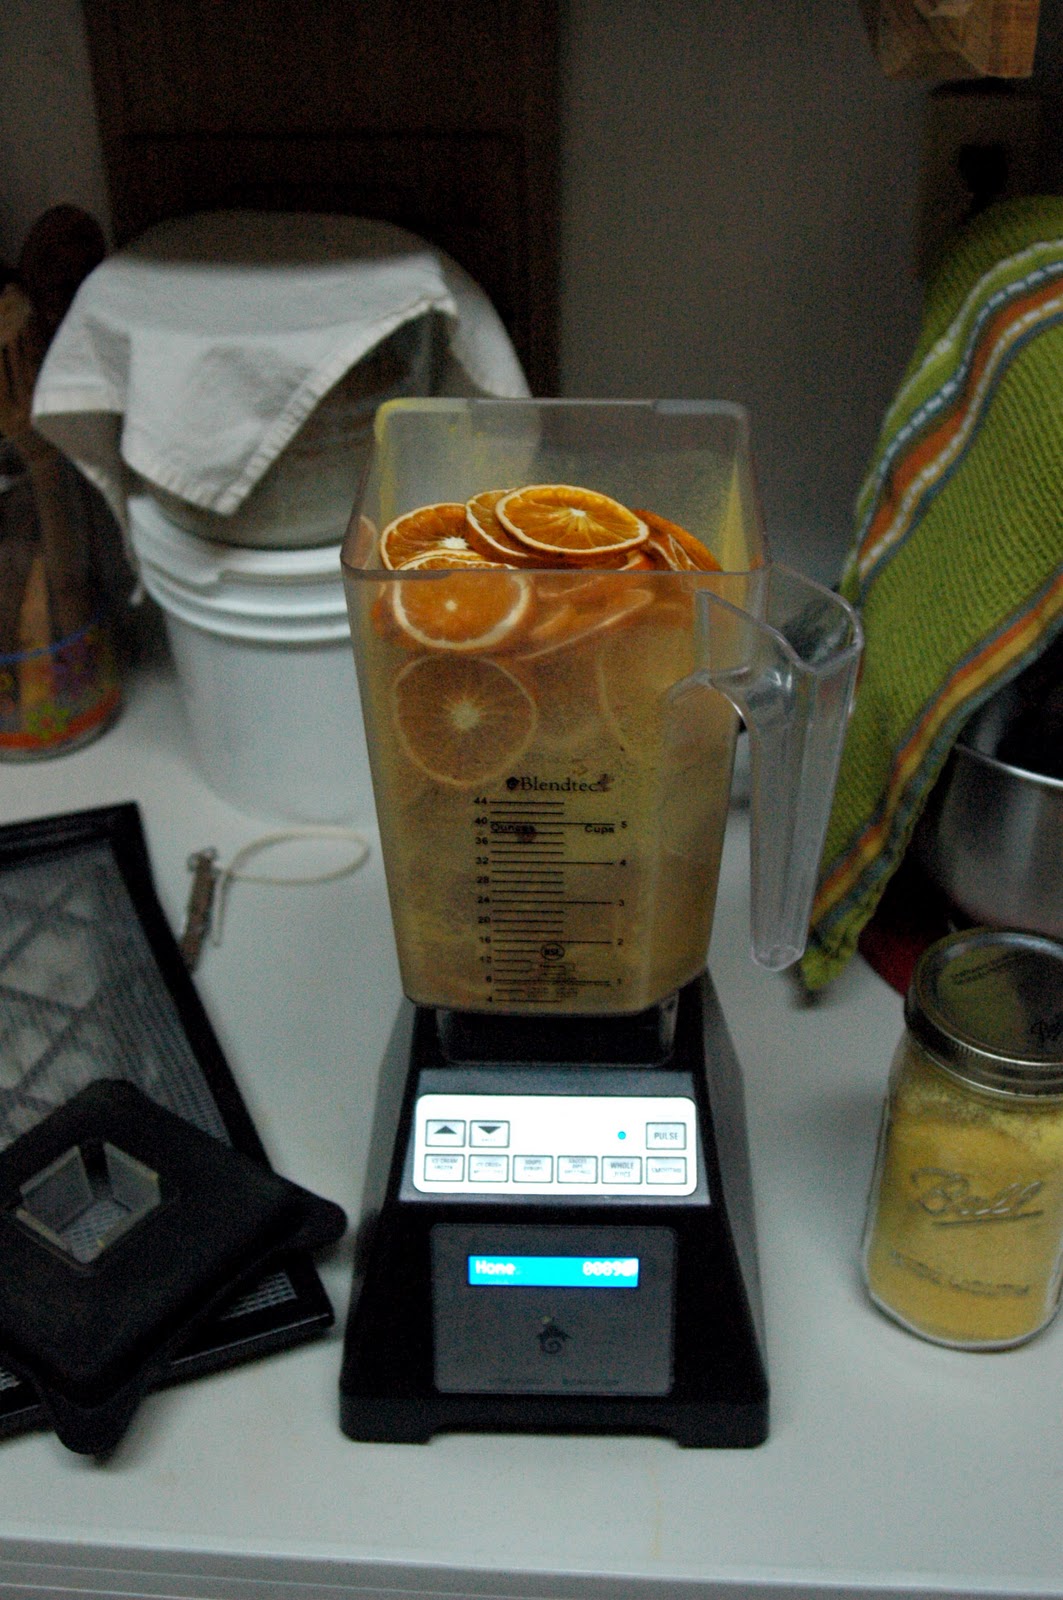
Grinds grain perfectly. I was shocked by how good this monster can grind grains into fine powder... it can even turn flax seeds and chai seeds into a nice powder! I have tried grinding my grains in my old Vitamix and wasn’t too happy with how hot and gritty it would get. Plus, some of the flour would get stuck in the base. With Blendtec, you can blend both dry and wet ingredients in one container (with Vitamix you have to buy two!) and does a way better job, all because of that wide square base! You can only grind 2 cups at a time, not exactly ideal for large quanities of bread baking, but great for everyday flour needs (ex: pancakes, muffins, crackers, etc.). I've grind my orange chips into powder in Blendtec and love how quickly it does the job!

Makes fantastic “smooth” smoothies. We love our smoothies, especially green smoothies whenever I am able to get fresh lettuce or spinach. I am so happy with my smoothies because they come out so smooth that you really can’t tell by texture what’s in the smoothie. I am able to “hide” some things in the smoothies from my girls and they slurp it up with delight! Another bonus, I can throw in whole raw flax or chai seeds and they are completely grinded smooth with no lingering texture. Never been able to do that with old Vitamix!

More versatile. According to the company, Blendtec can replace up to nine other kitchen applicances - no need for a grain mill, juicer, bread machine, ice cream maker , smoothie maker, blender, milkshake maker, coffee grinder or ice crusher. But I honestly can't live without my ice cream maker or juicer as they do best what they are made to do!
Makes smooth sauces with ease. I love how I can throw in a whole apple (skin, seeds and all!), add a little water and in several seconds get raw applesauce. Makes wonderful salsas, hummus, tomato sauce, mayo and other sauces in just over a minute! But you have to make sure to have enough moisture to keep it going without it getting too hot... normal for any blender.

Can do the job itself.Love how I don’t have to guess how long and how high or low of speed to use with Blendtec! This machine is a 'smart' blender, with 17 settings to get the job done! It’s simple, all I need to do is push my desired setting and let the machine do its job. I don’t have to stand there, hold the lid down and jiggle around with it like I had to with Vitamix. Blendtec has specific digital settings for pretty much every job and will turn off automatically when the task is done! Totally a muti-task machine… I can get a smoothie going or some sauce while prepping something else or cleaning up. Also, if you have an absent-minded family member, no worries… Blendtec will turn off on it own!

Very powerful & compacted. This machine is a monster, I am not kidding! It can tear through anything from 1560 watt with a 3 HP direct-drive motor and does not need any extra space to fit its mighty engine. It has run powerfully since the first day I used it and I've used it over 930 times! I couldn't say that for Vitamix, after just a year of using it The overall height is shorter, but wide and can fit in standard countertops. I couldn’t do that with old Vitamix, had to put the container next to the base because it is too tall. It is compacted enough that you can take with you when traveling, so you and your family can eat healthy while on the road!

Professional & very durable. After having Blendtec for over 2 years now, I can’t believe how durable it is! This Blendtec machine is popular in the majority of professional businesses and known for its high quality guarantee.


Better technology. I love how it shows on the screen how many times I've put Blendtec to work... over 930 times and it still works like new! When you run Blendtec, a timer comes up to show how much time is left before its done. Like I shared above... it is a 'smart' blender with 17 settings to get the job done well! I appreciate how the company took care to design their blenders with a wider base so there is no need to use a stick to push everything into the blade. That was one thing that bothered me about all the blenders I've used growing up, the narrow base... it never made sense to me because in order to 'cut & puree' your food up, you need room to allow the food to move around the blade, duh!

BPA-free plastic.Nice to know that I am not exposing my family to toxic chemicals when using it!

Looks pleasantly attractive. I like how simple and neat it looks, not bulky or awkward like Vitamix. Plus, you can choose a white, black or red base. I chose red, but they sent me a black one! Oh well, can’t complain when it was free!

Decent coverage.Each Blendtec Blender has a lifetime warranty on the blade so you don’t have to worry about it getting dull on ya! That was another issue I had with old Vitamix, the blade got pretty dull and wasn’t doing the job like they said it would. I was preparing myself to pay for a new blade and try to replace it myself! Blendtec is made with solid-state electronics which are more dependable and less likely to give you trouble, so you won’t have to go through the headache of sending it back for repairs!


Check out the video to visually compare Vitamx with Blendtec...


Now, I'm sure many of you are wondering if all I am saying is too good to be true.

It is for real so good and true!

Even better, Blendtec recently upgraded their warranty to 7 years. Before it was 3 years, but they've been making improvements and working towards bringing you the best quality kitchen appliance.

Vitamix and Blendtec are very similar, but Vitamix is more commonly known because it has been marketed better... but the Blendtec company has been changing that. Now, I'm sure you've been hearing the name pop up more and seeing it all over the food blogs nowadays.

Blendtec is the choice among professionals, especially among the raw foody crowd. Its body can fit on your countertop and one jar does it all, while Vitamix it too tall and has two different jars to accomplish everything. Vitamix doesn't turn itself off and has two switches that have to be used carefully during the blending process (a pain), while the Blendtec does all the work for you in speed, power and will turn off when done.


Now, the cost... Blendtec Wildside, which is what I have, costs $474.95... ouch, I know.

BUT BUT but when you consider the cost of purchasing all nine of those kitchen appliances that Blendtec can replace... you save a good chunk of $$$ with one fantastic machine! A grain grinder alone can cost around $250 and I don't even use or like the one I have!!

As a missionary, I've had to simplify and make use with what I have. If I had the Blendtec from the beginning... I would not have half the appliances I have in my kitchen right now. Honestly.

Also, the Blendtec company is coming out with a new, improved & fancier machine called the Total Blender Designer Series... go check it out and make sure to wipe up your drool! It is supposed to be much quieter than the other machines. Hope so! Mine sounds like a monster, but a good monster  ;o)

To wrap it up... if you were to invest in one machine that would help you transition to a whole foods lifestyle, this is the machine you want. It is quality in action.


Valentine Special:
Through February 14th, you can get $40 off the purchase of their newest edition... the Twister Jar. This is the lowest price ever for this amazing jar! The Twister Jar can create extra-thick blends like nut butters, hummus, baby food, dips, dressings, thick shakes and more! Compare peanut butter in the FourSide Jar (4-5 minutes) vs. the Twister Jar (35-45 seconds). The jar can be loaded up to a full 16 oz., which is incredible for dense ingredients. These jars normally sell for $129, but get it today for only $89!  That's almost half off the original price!


Small print stuff: Yes, I will earn a small commission through my links and that is no extra charge for you. Thank you for supporting my family this way!


Read More
Posted in Blendtec, kitchen gadgets, reviews, smoothies | No comments

mardi 7 février 2012

Make It Yourself ~Tangy Orange Powder

Posted on 14:02 by Unknown
Pin It


I am having too much fun taking pictures of these gorgeous orange chips and powder! The rich, sunny colors and beautiful, deep details just makes me want to keep clicking away!


Anyway...


I've already used this beautiful powder for a few things and have many more delicious plans for it! It smells like sunshine every time I open up the jar... hmm, must remember that when we have dark, rainy & cloudy days!


After dehydrating all those sunshine {orange} slices and enjoying them like chips and steeped in tea... I began to wonder if there were other ways to enjoy these yummy orange chips.


I googled around and came across this site that suggested to chop or grind the orange chips into powder, which can be used to flavor soup, fish, sauces or use has a garnish.


hmmm... interesting.


So, I threw in enough orange chips to fill my Blendtec and gave it a whirl... well, several whirls until it was powdery and smooth. It looks a little crumbly because of the natural oils from the rinds... simply wonderful!


I pour the powder into an airtight quart mason jar and kept throwing in more orange chips until I had almost 2 quarts full of tangy orange powder. And I still have about 1 1/2 gallons of orange chips to enjoy!


Ahh, lovely!


I have already used it to spice up cinnamon rolls, make drinks, give a tangy crunch to our favorite snack and more. I will {hopefully} be sharing these recipes soon!!


When you make these, make sure you store them out of direct light to protect the natural oils. They should last a long time  ;o)


Read More
Posted in dehydrated orange slices, dried orange chips, make it yourself, MIY, orange powder, orange season, oranges | No comments

jeudi 2 février 2012

Sweet n' Crunchy Roasted Chickpeas (4 Flavor Varieties!)

Posted on 22:48 by Unknown
Pin It

NOTE: Due to some bad batches... I made a note below on what kind of coconut sugar is best to use for making the Salted Caramel flavor. Please read below.

So yummy...
So crunchy...
So addictive!


I can't seem to make enough of this stuff to last more than just a few days. Not only are they a great gluten-free snack that give a nice fiber & protein kick, but they are also great treats when the sweet tooth comes knocking.


Whenever I make a batch of these... the traffic flow to the kitchen increases to the point where I have to hide the batch or they are gone in one day!


Hmmm... You know what, I need to go get a handful... just made some fresh today! Only I know where they are. I've gotten good at hiding things from my family when I need to... hehe! be right back!


Anyway, I'm sure you are one of the many mamas (or dads) out there looking for a good variety of snack recipes that are nutritious, inexpensive and easy to make.


Well, you can just add this to your list of homemade snacks to make!


I promise, promise that you will love it and your kids too! I tested these out with my friends from Wisconsin that came down to help us last month. I burned them a little because I had too much going on at once (don't do that!), but they still liked it and their kids enjoyed it too!


After making these awesome roasted chickpeas several times... I've finally got it down where they are just perfect. The first time I made them... my girls didn't like them at all. I tried again and they each ate a bowl, but it didn't really fly. Tried it the third time and they each ate a bowl then asked for more!


After messing around with several different recipes, I found that it is ideal to first roasted the chickpeas with butter or oil (you can dry roast if you prefer, which would take less time, but won't be as flavorful)... then create a syrup of sort using a mixture of melted butter or oil, spices and sweetener to stir in after the chickpeas are roasted. Many of the recipes just say to mix it all together and stick in the oven, but I've found that they burned too easily or the flavors just don't "pop" or, if using raw sugar, it just didn't glaze nicely around the chickpeas.


For examples... Look at the pictures... the ones that Naomi is holding (top two pictures) are perfectly glazed, while the ones that Tabi (above) is holding has some burned areas with an uneven coating of sweetener.


I also found that you really can't be shy with the sweetener. So many of the recipes call for only a couple teaspoons of sweetener per cup of chickpeas... ugh. I tried that and it really didn't taste sweet at all and I don't have a very strong sweet tooth. If you are using good sweeteners such as raw honey, rapadura/sucanat, maple syrup or coconut sugar... there's really no need to hold back! Lately, I've been using the leftover syrup from making candied orange spice peels... the light orange flavor is simply delicious and the syrup glazes perfectly around the chickpeas! Yum!


Lastly, most recipes tell you to peel the skin off the garbanzo beans... forget it! I've tried many different methods to get them off and decided that it wasn't worth it. Of course, I tend to pull out clumps of skins after washing the beans... so the job gets half done, more or less  ;o)


So, with all that said... please don't think it's complicated. I've basically got it figured out for you so that it should be a breeze... unlike it was for me during the first few times I made these guys!


If you want to make it super easy, just buy the can... but with all the BPA used in cans these days, I don't recommend it unless you buy this particular brand (BPA free). I prefer just soaking and cooking my own beans... so much cheaper and I don't have to wonder how much BPA is getting into our bodies!


Make sure to hang around the kitchen when making these because every time I keep an eye on them while doing something else in the kitchen... they come out perfect, but if I get distracted, leave the kitchen and leave them too long... they get burned. Maybe that's just me :o)


Again, I promise you and your kids will love it... just try it a couple times and see what happens. Enjoy! If you really don't like it... just let me know in the comments below.


Sweet n' Crunchy Roasted Chickpeas (4 Flavor Varieties)

4 cups dried garbanzo beans (chickpeas)
1 1/2 tsp baking soda
4 Tbsp butter, coconut oil or olive oil


NOTE: You can do this ahead of time and store the beans in the fridge.


Sort through the beans and remove any bad beans, rocks and dirt. Rinse them off and cover with very warm water. Stir in baking soda and set it aside. Allow it to soak overnight or preferably up to 24 hours. After they've soaked, drain them and rinse them off VERY good.


Put them in pot and cover with water. Bring to boil on high heat and skim off any scum that rises. Bring it down to low heat, cover it and let it simmer until soft. Drain them in a colander and rinse them really well. Let them drain for about 10 minutes to cool and dry out.


Turn the oven on to 375 F.


Pour the beans onto two baking sheets and spread them out. If they still look wet, dry them off with a paper towel. Cut or scoop your choice of butter or coconut oil onto the beans. Put them in the oven for 30 minutes to 1 hour or longer (time varies from oven to oven and moisture levels). Stir the beans after 5-10 minutes of roasting to evenly coat the beans with butter or oil. Stir once more about 20 minutes later. Test taste them towards the end. They are done when crunchy and lightly browned.


Meanwhile, choose one of the 4 flavors varieties given below and make a syrup by melting your choice of butter or coconut oil. Stir in sweetener and spices. Keep the heat on medium low, you don't want the mixture to burn. Stir until everything dissolves. Set aside.


While hot, transfer chickpeas into a bowl and thoroughly mix with your choice of syrup. Spread chickpeas back on baking sheets and roast for additional 8-10 minutes, stirring once or twice, or until the chickpeas look glazed.


Take them out and stir again. Grind or sprinkle sea salt over them (optional). Allow them to cool to room temperature (if you have self-control and can hold off the kids!) and store them in an airtight container. They should last up to a week no problems, but I haven't been able try that because all the batches I've made have never last more than 2 days!


Honey Chai
3 Tbsp butter or coconut oil
1/2 - 3/4 cup raw honey
1 Tbsp ground cinnamon
2 tsp ground ginger
2 tsp ground cardamom
1 tsp ground allspice
1/2 tsp ground cloves
1/4 tsp finely ground white pepper (optional)
sea salt (optional)


Salted Caramel
3 Tbsp butter or coconut oil
3/4 cup coconut palm sugar
2 tsp ground cinnamon
coarse sea salt
NOTE: I have discovered that using dry coconut sugar does not work for this recipe as it doesn't melt very well into the butter or oil. Coconut sugar paste is the best kind to use and can be bought at an Asian store. The paste is what I have used for making my salted caramel chickpeas with success before posting this. If you made this and had bad results... I am sorry... I hope you will try again using coconut sugar paste! It is delicious!


Pumpkin Spice
3 Tbsp butter or coconut oil
1/2 - 3/4 cup maple syrup
1 Tbsp ground cinnamon
2 tsp ground ginger
1/2 tsp ground nutmeg
1/2 tsp sea salt


Tangy Orange Spice
3 Tbsp butter or coconut oil
1/2 cup rapadura or sucanat
3 Tbsp dried orange powder (or just stir in 6 Tbsp orange juice)
2 tsp orange zest
1 tsp ground cinnamon
1/2 tsp ground ginger
1/4 tsp ground cloves
1/2 tsp sea salt


Wanna try some?


PS- These are fantastic snacks for traveling!


Read More
Posted in chickpeas, frugal snacks, garbanzo beans, homemade snacks. traveling, travel snacks, wholesome snacks, wholesome sweets/desserts | No comments
Articles plus récents Articles plus anciens Accueil
Inscription à : Articles (Atom)

Popular Posts

  • Pregnancy Notes: Postpartum Herbal Sitz Bath {recipe}
    Herbal sitz baths are extremely soothing, relaxing, healing  and a  great way to pamper a new mama after going through the tiring workout o...
  • About A Deaf Mama
    Ears to hear and eyes to see—both are gifts from the Lord. Proverbs 20:12 Hello! My name is Marillyn Beard and I am married to a wonderful G...
  • Contact
    Please contact me if you... Have any questions. Want to be a part of Sweet Wholesome Wednesday . Would like me to review a book or products ...
  • South Caribbean Adventures: The CHOCORART Chocolate Tour (Part 1)
    How's everybody doing today? Hope you all had a great day yesterday (Valentine's Day)! Have you been enjoying my posts about our Car...
  • Wish Cooking Healthy Food Was Simple?
    I am excited to share with you about GNOWFGLINS Fundamentals eCourse that will make preparing healthy food... simple and easy! Note: the en...
  • Pregnancy Notes: Top 11 Pregnancy, Childbirth, Breastfeeding & Postpartum Books/DVDs
    With so many books out there on pregnancy & childbirth... how do you know which ones are worth your time to read and which ones should b...
  • Coming Soon: Get 71 Harvest Your Health eBooks (plus MORE) for Only $37!
    THIS BUNDLE IS NO LONGER FOR SALE. Autumn is slowly coming in and the trees are showing off their beautiful shades of yellow, orange, purple...
  • Review & Giveaway: EcoUsable's Ech2o - The World's Only Stainless Steel Filtered Water Bottle
    Thank you Marc Wollman (Vice President of ecousable) for this AWESOME giveaway! Thank you everybody for all your shouts, this giveaway is no...
  • Sourdough Journal #14 - Preserving Your Thriving Sourdough Starter
    Pin It Have a great  sourdough starter , but want to save some just in case it dies?  Want to give some to a friend that lives a few states ...
  • Sourdough Journal #7: Cast-Iron Skillet Sourdough Molasses Cornbread
    Well, things have been quiet around here for many reasons... Writer's block, lack of motivation, my parents visiting, tired and life is ...

Categories

  • 7 Day Real Food Challenge
  • adobe house
  • advent
  • agua de sandia
  • almonds
  • aloe vera
  • Alternative Laundry Series
  • apples
  • avocados
  • babies
  • babywearing
  • baked oatmeal
  • bakes oatmeal
  • beans
  • beef tongue
  • beef tongue recipes
  • Berkey products
  • birth DVDs
  • birth story
  • birthdays
  • blackberries
  • Blendtec
  • blog awards
  • body scrubs
  • bones
  • book reviews
  • books
  • Bookworm Reports
  • breakfast
  • breastfeeding
  • Bulk Herb Store
  • Bundle of the Week
  • busy life
  • butter
  • butter oil
  • butternut squash
  • Caribbean Adventures
  • chickens
  • chickpeas
  • childbirth books
  • chocolate
  • chocolate cake
  • chocolate peppermint cake
  • Christian books
  • Christmas
  • Christmas gifts
  • cinnamon
  • citrus fruit
  • cloth
  • cloth diapers
  • cloth pads
  • cloth wipes
  • coconut flour
  • coconut oil
  • coconut palm sugar
  • coconuts
  • comfort food
  • cookbooks
  • cookies
  • cranberries
  • crock pot
  • cultured dairy
  • curd
  • curd bars
  • dairy-free
  • deaf
  • December Photo Project
  • December Photo Project 2011
  • dehydrated orange slices
  • dehydrating sourdough
  • dehydrator
  • desserts
  • diary-free
  • dried orange chips
  • easy frosting
  • ebook
  • eBook Bundle
  • ebook discount
  • egg yolks
  • elderberries
  • essential oils
  • fall recipes
  • family
  • FAQs
  • farmer's markets
  • fermented cod liver oil
  • Fight Back Fridays
  • filtered water
  • fluoride
  • food news
  • Foodbuzz
  • foodie fights
  • Foodista
  • free stuff
  • frugal meals
  • frugal snacks
  • garbanzo beans
  • gardening
  • garlic
  • giveaways
  • gluten-free
  • GMOs
  • GNOWFGLINS Dehydrating Class
  • GNOWFGLINS e-Course
  • grain-free
  • group b strep
  • guest post
  • handmade
  • Harvest Your Health Bundle Sale
  • He is risen
  • healthy fats
  • healthy nuts
  • healthy postpartum
  • Hello Morning Challenge
  • herbal medicine
  • herbal remedies
  • herbal sitz bath
  • herbs
  • homebirth
  • homemade
  • homemade candy
  • homemade cereal
  • homemade chorizo
  • homemade extracts
  • homemade mayonnaise
  • homemade snacks
  • homemade snacks. traveling
  • homemade sourdough tortillas
  • homemade tea
  • homemade trail mix
  • homemade vanilla
  • homemade wipes
  • Homemaking eBook Bundle Sale
  • homeopathy
  • homestead
  • homesteading
  • Honduras
  • honey
  • honey-sweetened
  • horchata
  • ice cream
  • ice cream pie
  • Italian Drip Sandwich
  • Jesus
  • JMN videos
  • Just Making Ice Cream
  • kefir
  • kelp
  • kitchen gadgets
  • labor and birth
  • lacto-fermented food
  • Life
  • life in Costa Rica
  • life in Honduras
  • limes
  • loose herbs
  • make it yourself
  • mangos
  • marmalade
  • missionaries
  • missionary life
  • MIY
  • movie
  • mud house
  • muffins
  • my faith
  • my family
  • my story
  • Naomi
  • natural birth
  • natural deodorant
  • natural drinks
  • natural home alternatives
  • natural living
  • natural nipple cream
  • natural postpartum care
  • natural pregnancy
  • natural preventative care
  • natural remedies
  • natural sweeteners
  • naturally sweetened sweets
  • Nourished Kitchen e-course
  • Nourished Living Network eBook Bundle
  • nourishing ingredients
  • nourishing ways
  • nursing
  • nursing tea
  • nut & seed
  • nut-free
  • oatmeal
  • oatmeal bake
  • odd bits
  • orange powder
  • orange season
  • oranges
  • Organics in Costa Rica
  • organize
  • Other Things
  • paleo/primal eBooks
  • palm shortening
  • pancakes
  • pecans
  • Pennywise Platter Thursday
  • peppermint
  • perserving naturally
  • photography
  • phytic acid
  • pie crusts
  • Poema
  • popsicles
  • porridge
  • postpartum books
  • potpourri
  • prayer needs
  • pregnancy
  • pregnancy books
  • pregnancy exercises
  • pregnancy health
  • Pregnancy Notes Series
  • pregnancy tea
  • preserving sourdough
  • preventing group b strep
  • probiotics
  • pumpkins
  • quiet time
  • raw apple cider vinegar
  • raw food
  • raw milk
  • Real Food
  • real food article
  • Real Food Face-Off
  • Real Food Media
  • Real Food Wednesday
  • real salt
  • recipe round-up
  • recipes
  • restaurant reviews
  • reviews
  • RO4Y
  • rolled oats
  • sea salt
  • simple life
  • Simple Lives Thursday
  • simple tips
  • slow cooker
  • smoothies
  • soaked nuts
  • soaking grains
  • soaking nuts
  • soups
  • sourdough
  • sourdough biscuits
  • sourdough cake
  • sourdough cinnamon rolls
  • sourdough cookies
  • sourdough cornbread
  • sourdough eCourse
  • sourdough english muffins
  • sourdough focaccia
  • sourdough journal
  • sourdough pizza
  • sourdough pot pie
  • sourdough starter
  • special guests
  • spirulina
  • stevia
  • sugar-free
  • superfood for pregnancy
  • supplements
  • Sweet Wholesome Wednesday
  • Tabitha
  • tea
  • thankfulness
  • Tobias
  • top posts
  • tortilla pizza
  • traditional food
  • travel snacks
  • traveling
  • Tuesday Twister
  • tutorial
  • Tyndale book reviews
  • Ultimate Homemaking Bundle Sale
  • walnuts
  • WAPF
  • WAPF food
  • Weekend Herb Blogging
  • whole food supplements
  • whole grains
  • wholesome
  • wholesome cookies
  • wholesome eating
  • wholesome snacks
  • wholesome sweets/desserts
  • winners

Blog Archive

  • ▼  2014 (12)
    • ▼  mai (3)
      • Pregnancy Notes: Postpartum Herbal Sitz Bath {recipe}
      • Pregnancy Notes: DIY Natural Nipple Cream {recipe}
      • Making the Adobe Bricks
    • ►  avril (7)
    • ►  janvier (2)
  • ►  2013 (50)
    • ►  décembre (1)
    • ►  novembre (3)
    • ►  octobre (7)
    • ►  septembre (3)
    • ►  août (4)
    • ►  juillet (2)
    • ►  juin (3)
    • ►  mai (8)
    • ►  avril (5)
    • ►  mars (6)
    • ►  février (5)
    • ►  janvier (3)
  • ►  2012 (41)
    • ►  décembre (6)
    • ►  novembre (3)
    • ►  octobre (1)
    • ►  juillet (6)
    • ►  juin (6)
    • ►  mai (4)
    • ►  avril (1)
    • ►  mars (2)
    • ►  février (5)
    • ►  janvier (7)
  • ►  2011 (82)
    • ►  décembre (19)
    • ►  novembre (1)
    • ►  septembre (2)
    • ►  août (7)
    • ►  juillet (9)
    • ►  juin (9)
    • ►  mai (11)
    • ►  avril (13)
    • ►  mars (4)
    • ►  février (4)
    • ►  janvier (3)
  • ►  2010 (30)
    • ►  décembre (1)
    • ►  avril (5)
    • ►  mars (3)
    • ►  février (19)
    • ►  janvier (2)
  • ►  2009 (137)
    • ►  décembre (21)
    • ►  novembre (16)
    • ►  octobre (14)
    • ►  septembre (11)
    • ►  août (17)
    • ►  juillet (12)
    • ►  juin (19)
    • ►  mai (13)
    • ►  avril (9)
    • ►  mars (5)
Fourni par Blogger.

Qui êtes-vous ?

Unknown
Afficher mon profil complet